

Adobe Illustrator is a great tool for typography. Learn how to create cool text effects with Illustrator such as image text, wave, reflection and 3D. Quick and easy to apply, give it a try!
Cool Text Effects with Illustrator – Image Text
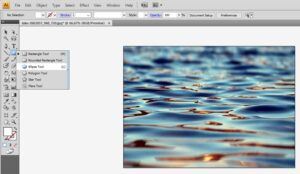
1. Open a blank document.
2. File → Place → choose a background image you want to fill your text with (in this example, an image of water).
3. Select the Ellipse tool from the left-hand toolbar → draw an oval shape over the centre of the image (whatever colour you choose).
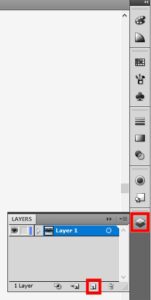
4. Select the layers panel in the right-hand column. Create a new layer.
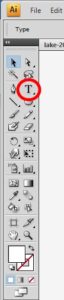
5. Select the text tool from the left toolbar.
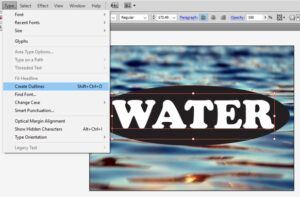
6. Place your cursor on the oval and type your text – use a thick font like Cooper Black. Choose a different colour so you can see your text.

7. Click on your text so it’s outlined with a box. Go to Type → Create Outlines (or Ctrl+shift+O or right-click).
8. Drag your mouse around the entire document to select everything.

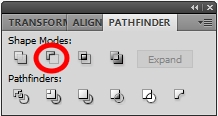
9. Go to Windows → Pathfinder.
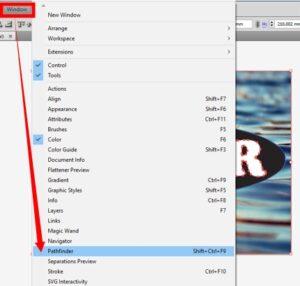
10. In the shape modes, select ‘Minus Front.’ Click outside of your image to clear the markings.
End result:

Cool Text Effects with Illustrator – Wave Text
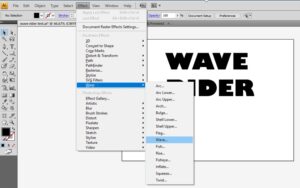
1. Type your text (pick a thick font).

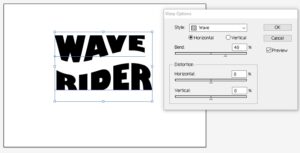
2. Select the text → Effect → Warp → Wave.
3. Adjust the blend percentage to get your preferred effect (between 35-40% is good). Tick the preview box so you can monitor your changes.
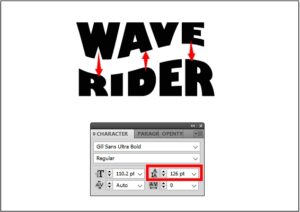
4. Press Ctrl+T to bring up the character box.
5. Press the leading arrows to reduce the space between the two words.
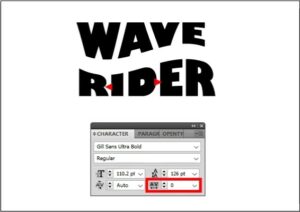
6. Press the tracking arrow to adjust the space between letters.
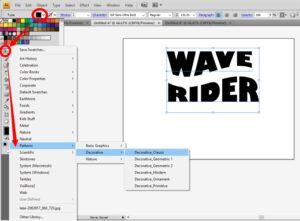
7. Add a colour or pattern swatch. Select the colour box → Swatch Libraries Menu → Patterns → Decorative → Decorative Classic.
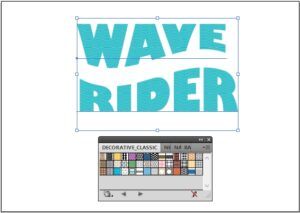
8. Choose a pattern like ‘Waves Smooth Color.’
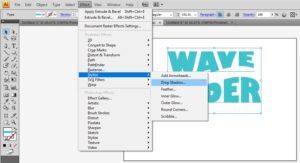
9. You can add other effects to your text too: Effect → Stylize → Drop Shadow.
End result:

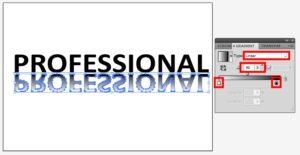
Cool Text Effects with Illustrator – Reflection Text
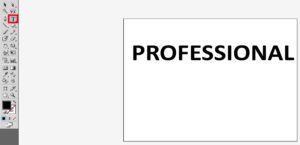
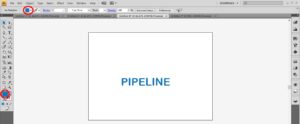
1. Open a blank document → select the text tool from the left toolbar → type your text.
2. Go to Type → Create Outlines (or Ctrl+shift+O or right-click).
3. Select the arrow tool in the top left corner of the toolbar. Click on the text, hold down the alt key and drag your mouse to create a copy underneath (otherwise, copy and past text via Edit or right-clicking).
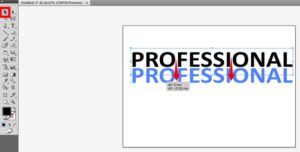
4. Go to Object → Transform → Reflect → change to horizontal axis → tick the preview box and move your copied text to align with the original text above.

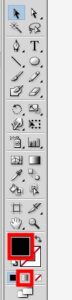
5. In the left-hand toolbar, click on the black foreground → select the gradient box underneath.
6. Make sure Linear is selected. Change from 0 to 90 degrees. Adjust the opacity and play around with the black and white tabs to create a faded reflection effect.
End result:

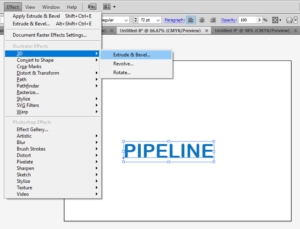
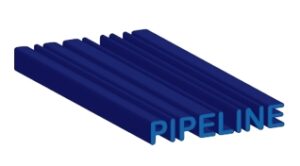
Cool Text Effects with Illustrator – 3D Text
1. Add your text and change fill colour from black to another shade.
2. Effect → 3D → Extrude & Bevel.
3. Select the preview button so you can see the results as you adjust.
4. Adjust the extrude depth to around 650 pt.
5. Make sure the surface is ‘Plastic Shading’ → Ok.

6. For more contrast, select your text and pick a darker stroke colour.
End result:
Check out more graphic design tricks: