

The Find and Replace tool is a super time saver. It can make numerous modifications in seconds, saving you from manually scouring through your entire document. What many people don’t realise, is you can use this tool for much more than replacing a simple word.
Discover brilliant ways to use the Find and Replace tool to its full potential. Topics include:
- General functions
- How to eliminate spaces
- How to format in bulk
- Replace styles and special characters
- Use codes to add to existing words
- Create and locate bookmarks
What is the Find and Replace Tool?
This tool helps you locate a word, phrase, or character and replace it with new text and/or formatting.
To access:
Home tab → Replace button (far right in the ‘Editing’ group).

General Functions of the Find and Replace Tool
This is a general outline of the Find and Replace tool. You can scroll further to view bonus tips and tricks.
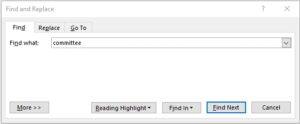
Find
This is the first tab of the pop-up box. Here you can enter the word or phrase you want to locate. Press the ‘Find Next’ button to locate each instance of that word. You can also search for words in the navigation pane, by selecting Ctrl+F.
Replace
This is the second tab in the pop-up box.
- In the ‘Find What’ field, enter the original word.
- In the ‘Replace With’ field, enter the new word you want to replace with.
You can replace a single word then check out the next or replace them all in bulk. The same applies to replace punctuation.

Note: if you want to search just part of your document, highlight your selection before using the Replace tool. You’ll know it’s searching just the selection as it will show the words ‘Search Down’ under the ‘Find What’ field.
Go To
This is the third tab. Here, you can move your cursor to specific destinations within the document. E.g. go to a certain page, heading, or graphic.

Keyboard Shortcuts: Ctrl+H and Ctrl+G
Discover 8 Brilliant Tricks Using the Find and Replace Tool
The Find and Replace tool is handy for more than replacing a word. Here are some simple tips to save you more time when proofing your document.
1. Eliminate Spaces
If you have too many spaces in your document, you can fix this with the Replace tool.
Replace → in the ‘Find What’ field, enter code ^p^p → in the ‘Replace With’ field, enter code ^p.

2. Change Formatting
This is a quick way to alter your text appearance.
Replace → More → select from the Format list.
Here, you can modify font, spacing, page breaks, highlight text, and more.
Example: change the word ‘corporate’ to Italics throughout the document.
- In the ‘Find What’ field, enter the word you want to change.
- Move your cursor to the ‘Replace With’ field.
- From the format list, select font.
- Change the style to Italic.
- In the Replace box, the format in the second field is now tagged as ‘Italic.’
- Press Replace or Replace All.
To remove changes, select the ‘No Formatting’ button.

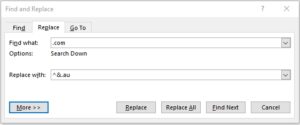
3. Use a Code to Add to Existing Words
Sometimes you might need to add to an existing word. Rather than replacing it with corrections, you can add to it using the code ^&
E.g. you need to add ‘.au’ to all your email addresses.
4. Replace Words Using A Code Instead of Typing
To save your poor fingers from excess typing, you can use code:
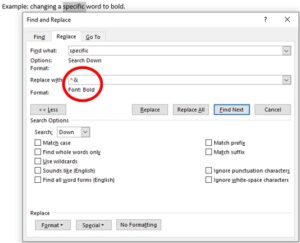
Example: changing a specific word to bold.
- Highlight the word you want to change.
- Open Replace tool. The highlighted word should appear in the ‘Find What’ field.
- In the ‘Replace With’ field, enter the code: ^&
- Add your formatting changes and replace.
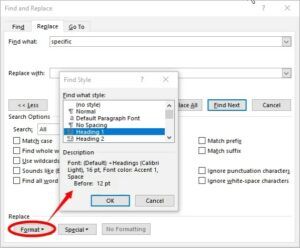
5. Change Styles
This is a quick way to make bulk changes rather than formatting separately.
Replace → More → Format → Style.
Here you can select from a range of styles. A description of font, size, spacing, etc. is provided. Like the previous example, the ‘Replace With’ field will be tagged with your chosen style.
To remove changes, select the ‘No Formatting’ button.
>>Learn more about Styles here<<
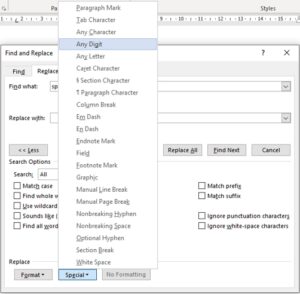
6. Change special characters
This is a quick way to add and change special characters.
Replace → More → select from Special list.
Here you can search and change a wide variety of special characters. Each has its own code so you can enter manually in the future if you wish.
E.g. code ^# to find digits. Code ^$ to find currency.
7. Highlight text
You can highlight specific words or phrases throughout your document.
- On the Home tab, select your highlight colour from the font group.
- Replace → enter the word you want to highlight.
- More → Format → Highlight.
To remove changes, select the ‘No Formatting’ button.

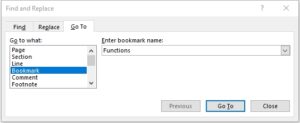
8. Bookmark
You can bookmark any section of your document for future use. This is handy if you’re constantly reference something.

- Place your cursor in the section you want to bookmark.
- Insert tab → Bookmark (located in Links group).
- Give your bookmark a name.
- Press Ctrl+G to open the ‘Go To’ panel.
- In the drop-down list, choose ‘Bookmarks.’
- Select your bookmark and the document will move to that section.
Are there any other ways you use the Find and Replace tool? Sharing is caring – add your tips below to help others.


1 thought on “8 BRILLIANT TRICKS USING THE FIND AND REPLACE TOOL – MS WORD”