

Protecting your work is important, especially when there are many people accessing the same file. It can be difficult to track who has modified what. In this article, you will learn how to protect a word document (Windows) in various ways:
- Read-only/password access
- Allow changes to parts of the document
- Editing restrictions
- Formatting restrictions
- Allow exceptions
- Digital Signatures
Ways to Protect a Word Document
There are several ways you can protect a Word document. To see your options, follow these steps:
- Open your Microsoft Word document.
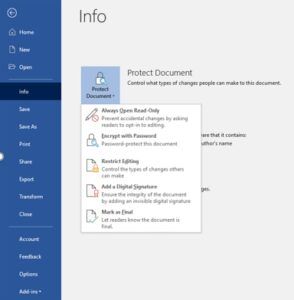
- File → Info → Protect Document.
- You are given five options:
- Open in read-only
- Encrypt with Password
- Restrict Editing
- Add a digital signature
- Mark as Final
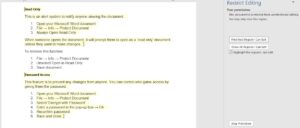
Read Only
This is an alert system to notify anyone viewing the document.
- Open your Microsoft Word document.
- File → Info → Protect Document.
- Always Open Read-Only (option 1).
When someone opens the document, it will prompt them to open as a ‘read-only’ document unless they want to make changes.

To remove this function:
- File → Info → Protect Document.
- Deselect ‘Open in Read-Only.’
- Save the document.
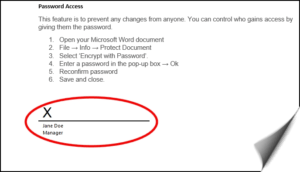
Password Access
This feature is to prevent changes from anyone. You can control who gains access by giving them the password.
- Open your Microsoft Word document.
- File → Info → Protect Document.
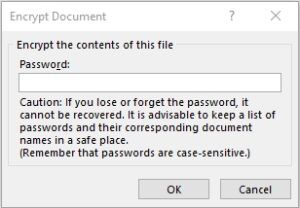
- Select ‘Encrypt with Password.’
- Enter a password in the pop-up box → Ok.
- Reconfirm password.
- Save and close.
When you reopen the document, it will ask for the password before you can proceed.
To cancel password protection:
- File → Info → Protect Document.
- Encrypt with Password.
- The pop-up box will appear → delete password → Ok.
- Save the document.

Restrict Editing
With this feature, you can restrict changes to parts of the document.
- Open your Microsoft Word document.
- File → Info → Protect Document.
- Restrict Editing.
- A box will appear on the right-hand side of your document. This provides several ways to restrict access, as follows.
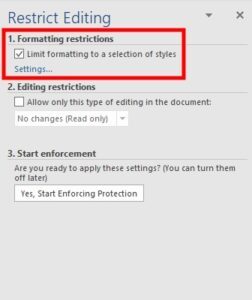
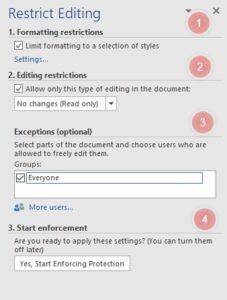
Set formatting restrictions:
- Tick ‘Limit formatting to a selection of styles.’
- Press ‘Settings’ and choose which styles you want to prevent people from modifying. You can select ‘All’, select ‘None’ to clear the selection or choose ‘Recommended Minimum’ for Word to make a selection.
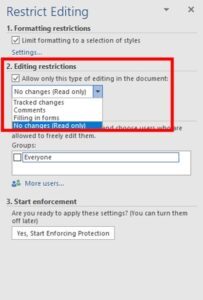
Editing restrictions:
- Tick ‘Allow only this type of editing in this document.’
- Select from the drop-down list which changes to allow (tracked changes, comments, filling in forms, or no changes).
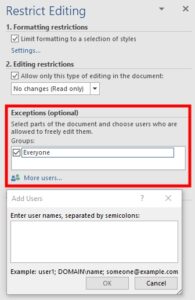
Allow exceptions:
- This feature only applies if you’ve set editing restrictions to ‘Comments’ or ‘Read Only’
- Check the box of who you’ll allow access to. If the person isn’t on your list, you can press ‘More users’ and add them in.
Start enforcement:
- To apply new settings, press the button ‘Yes, Start Enforcing Protection’
- You can create a password if you want, if not press Ok.
Protect a Word Document by Restricting Sections
In this feature, you can choose which areas of the document you want to restrict changes.
- In the ‘Restrict Editing box’ select editing restrictions to ‘No Changes (Read-Only).’
- Highlight which parts of the documents you will allow to be modified. This can be anything from a word to a paragraph or more. Use the ‘Ctrl’ key to select numerous sections.
- In the Exceptions box, select ‘Everyone’ or the specific users you want to grant access to.
- Press the button ‘Yes, Start Enforcing Protection.’
- Choose whether you want to create a password.
- The document now highlights which areas the person can edit. You can use the ‘Restrict Editing’ pane to navigate to the accessible regions.
To remove editing restrictions:
- Select the ‘Stop Protection’ button.
- File → Info → Protect Document.
- Deselect ‘Restrict Editing.’
- Save the document.
Add a Digital Signature
You can use a digital signature to confirm the information came from the signer and is authentic.
- File → Info → Protect Document.
- Add a Digital Signature.
- To create this, you need to get a digital signing certificate.
Insert a Signature Line
- Place your cursor where you want the signature line to go.
- File → Insert → Add a Signature Line (located in Text group).
- Here, you can add details such as the signer’s name, job title, email address, and any instructions. You can include a date and give the signer options to add comments.
- To remove, select the signature line and delete.

Insert Image Signature
- Scan your signature → save it as an image.
- File → Insert → Pictures → select the signature image.
- To remove this, select the image and delete.
Mark as Final
This clearly marks the document as a final copy, so users know the editing is complete.
- File → Info → Protect Document
- Mark as Final.

To remove this feature:
- File → Info → Protect Document
- Deselect ‘Mark as Final’
- Save the document.

2 thoughts on “HOW TO PROTECT A WORD DOCUMENT”